
Home About Information & How To's Products Gallery Links Contact
Making a Tut Peg loom
At the suggestion of others, I decided to experiment with the practicality of weaving Tut pouches on a peg loom, and, unable to find a suitable loom for sale, I determined to make my own. Thinking that I might want to make a tutorial for the loom if it was a success, I photographed the process, the results of which are these instructions. However, during the construction process, I discovered that the wire brads caused the wood to split, which was the result of the wood being too thin. So be sure to read the comments about that below before building a loom. Despite the split wood, the loom does work fine, and I have used it with good success. This loom is designed to work with 10/2 linen for making reproduction Tut slings, but if you use larger and fewer pegs, you can make a loom for working with other materials as well.
Tools and Materials
For this project you will need:
Some small pieces of wood (for dimensions, see below)
1/2 x 19 steel wire brads (you need 120 of these).
Glue and nails
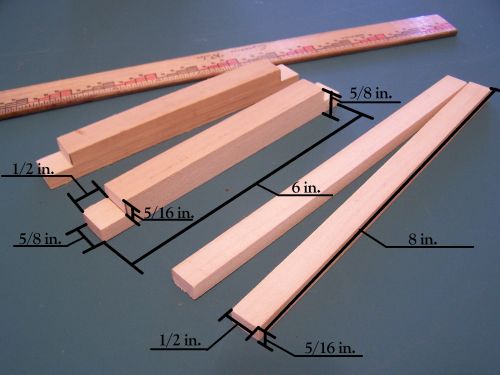
Illustrated here are the dimensions I used for this loom, but as I said above the wood split when I was putting in the wire brads, so I would not recommend using those dimensions, but I have included them for reference. What I would recommend, and what I myself used for the next loom I built, is to make both the 6 in. pieces and the 8 in. pieces 3/4 in. wide and 3/4 in. tall. The ends of all four pieces should be cut out as the 6 in. pieces are above, only the dimensions of the cut out should be 3/8 in. tall and 3/4 in. long instead of 5/16 in. x 1/2 in.
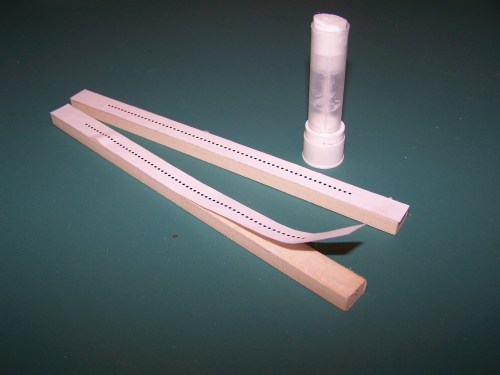
In order to position the wire brads evenly to form the pegs, I created a paper pattern to glue temporarily onto the 8 in. pieces of wood to serve as a guide. I wanted 6 in. worth of pegs spaced at 10 pegs per inch, which is a total of 60 pegs. I used a simple glue stick to attach the patterns for ease of clean-up when I removed them. The pattern for the pegs is available here.
The next thing to do is to pre-drill all the holes with a wire gauge drill bit. The bit I used was borrowed, and unfortunately I'm not sure of the size, but it was pretty small. Drill right through the paper pattern, and when all the holes are finished, peel and wash off the paper.
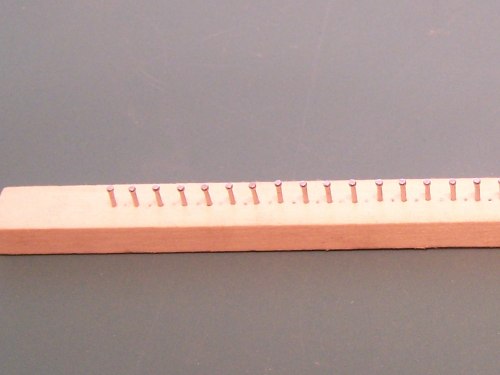
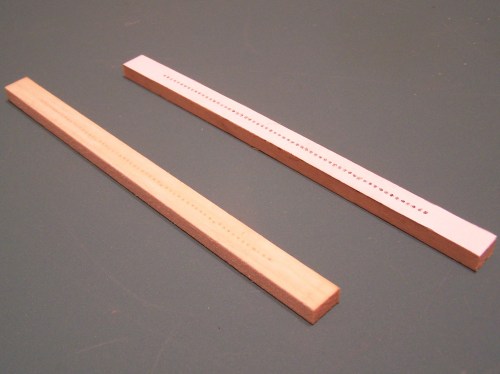
To insert the wire brads, begin at one side, and pound a brad into every other hole as shown above. They should be pounded in until about 3/16 - 7/32 in. is sticking up above the wood.
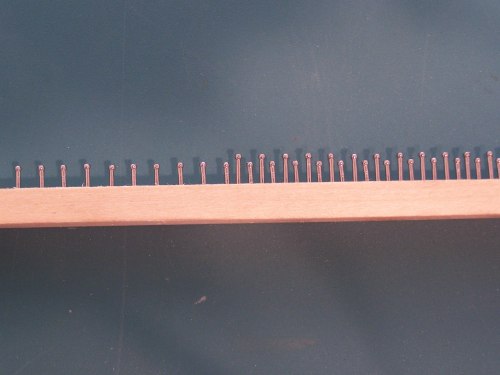
When you have a brad in every other hole go back and pound brads into the empty holes, but only pound them in until 1/4 - 9/32 in. is above the wood. You can see the difference in height of the brads in the illustration. The reason for this is that because of the thickness of the brad heads and the fact that the brads are only 1/10 in. apart on centers, there isn't much room to put the thread between the pegs when the loom is used, so the heights are staggered to allow more space for the thread. The reason the shorter pegs are all pounded in first is that it is very difficult to pound a short peg in next to a tall peg without hitting the tall peg with the hammer.
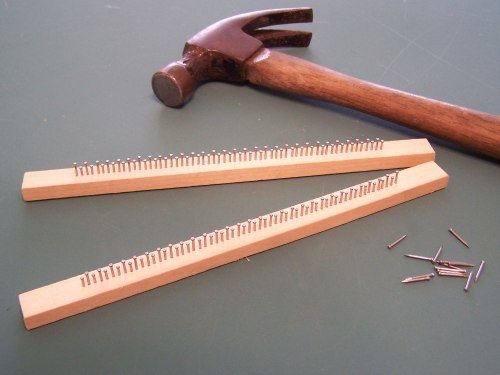
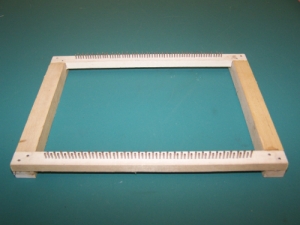
Here you can see the pegs all in place. Now the loom is ready for the final assembly.
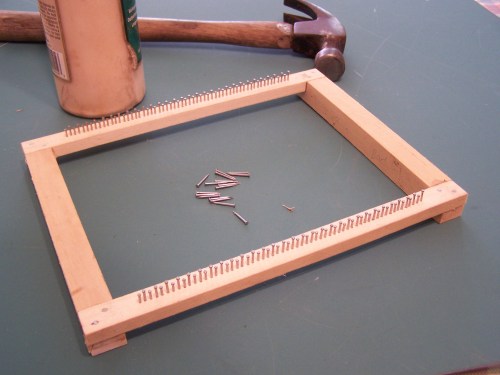
To assemble the loom, simply glue the pieces and nail them together to secure them as shown. As soon as the glue is dry, the loom is ready to use. For instructions on how to use this loom for making a reproduction Tut sling see Tut Tutorial II
"So David prevailed over the Philistine with a sling and with a stone..." I Samuel 17:50
Home About Information & How To's Products Gallery Links Contact
Copyright by Timothy Potter